
Wondering how to teach slope to 8th grade students?
Whether you’re a new algebra teacher, or you’re just looking for a way to teach it – you’ll learn best practices and new ideas here in this article.
Slope is one of those topics in 8th-grade math that either clicks right away, or leaves students completely confused. So don’t be discouraged if it’s something your class is struggling with!
If you’ve ever had students mix up rise and run, struggle with positive versus negative slopes, or look at a table of values like it’s written in another language, you’re not alone.
Thankfully, teaching slope can be a lot easier when we make it more hands-on and relevant.
In this post, we’ll break down exactly how to teach slope in a way that sticks. From graphing activities to movement-based learning, we’ll cover everything you need to help your students confidently find, interpret, and apply slope.
And if you’re in a rush? Or if you’re looking for a resource to help you teach slope?
➡️ Then click here to check out my linear equations and slope project.
About Kristen and Moore Than X
I’m a high school math teacher who’s passionate about project-based learning, and making math relevant for students.
You can learn more about me and Moore Than X here.
Understanding the Concept of Slope
Before students can confidently calculate or graph slope, they need to understand what it actually represents.
Slope is the rate of change between two points and the key to understanding how lines behave on a graph.
What is Slope?
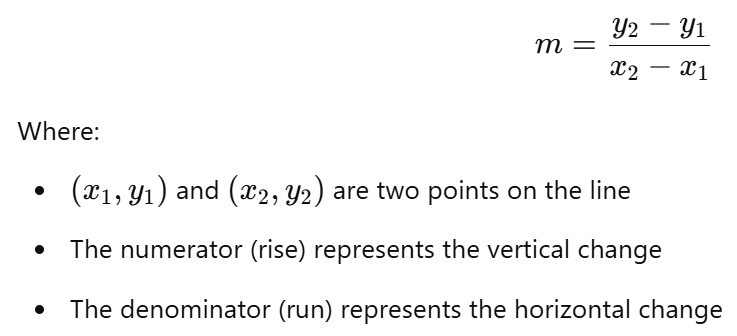
At its core, slope measures how steep a line is. It tells us how much a line rises or falls as it moves from left to right. We use the formula:
To make this concept click, try connecting it to something students already know—like stairs, hills, or even slides at the playground. A steep staircase has a greater slope than a ramp, just like a steep line has a greater slope than a flatter one.
The Four Types of Slope
One of the easiest ways to help students remember the different types of slope is with movement or visuals. Here’s a quick breakdown:
- Positive Slope (↗️) – The line goes up from left to right. Think of hiking up a hill.
- Negative Slope (↘️) – The line goes down from left to right. Imagine skiing down a mountain.
- Zero Slope (➡️) – The line is completely horizontal. It’s like walking on a flat sidewalk.
- Undefined Slope (⬆️⬇️) – The line is completely vertical. You can think of it as a cliff—you can’t walk straight up!
If you haven’t already, you can make an anchor chart with your students.
Or, have them make their own for review – and ask them to identify which type of slope it is, whenever one is on the board or in a problem being shared with the class.
Making It Stick with Visuals
Instead of just telling students these rules, show them with graphs and let them explore:
- ✅ Have students physically walk out slopes using tape on the floor.
- ✅ Use colored highlighters to mark rise and run on a coordinate plane.
- ✅ Let students guess slopes of different ramps and staircases in your school.
By reinforcing slope as a real-world concept before diving into calculations, you’re setting students up for success as they move into graphing and equation-based problems.
Hands-On and Visual Approaches to Teaching Slope
Slope is something students can see, touch, and experience in the real world.
The more interactive and visual your approach, the better your students will grasp the concept.
Using a Coordinate Plane to Show Rise Over Run
Instead of jumping straight into formulas, start by letting students explore how points move on a graph. Give them a coordinate plane and two points, then ask:
- How far up or down do you move? (Rise)
- How far left or right do you move? (Run)
Having students physically draw arrows and count squares on a grid helps them internalize rise over run before introducing the formal slope formula.
✅ Tip: Use colored pencils or highlighters to emphasize the difference between rise and run. One color for vertical movement, another for horizontal.
Real-World Slope Connections
Once students have the basics down, help them see slope in action:
- Wheelchair ramps – Discuss why accessibility ramps have a specific slope.
- Slides at the playground – Which slide is steeper? Why?
- Hiking trails – Compare the slope of different trails or roads.
Encourage students to look for slope in their everyday lives. Have them bring in pictures of real-world slopes or measure inclines around the school to reinforce the concept.
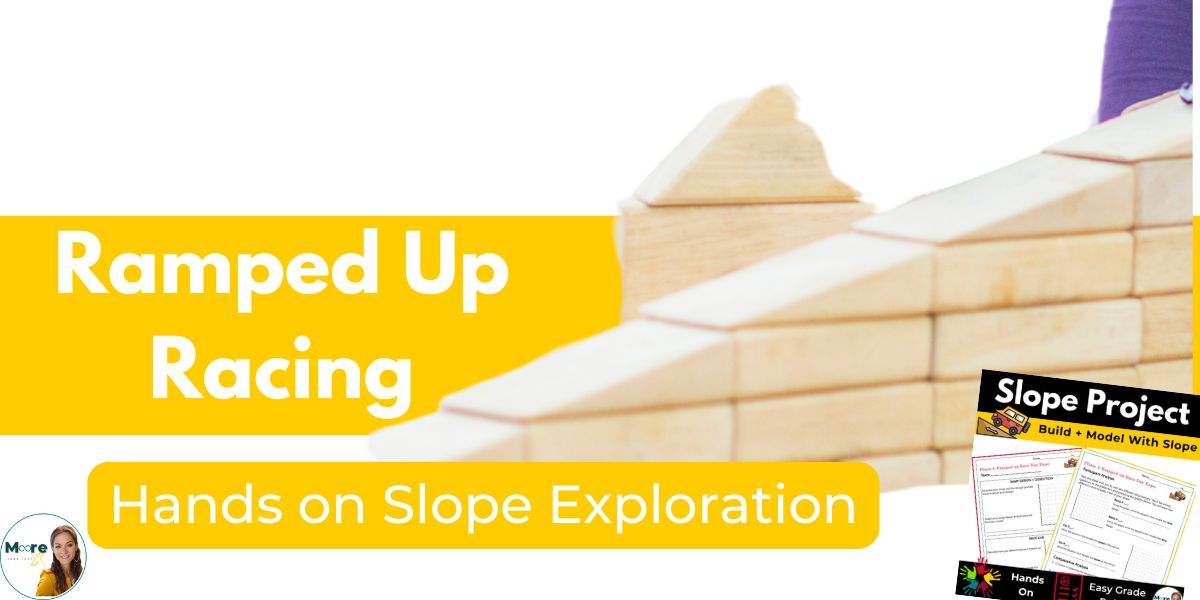
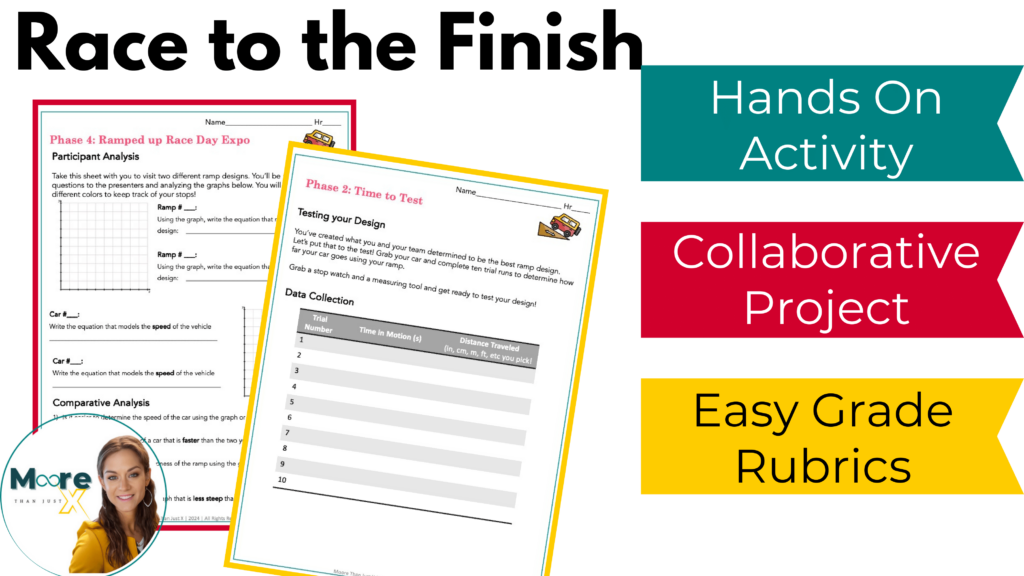
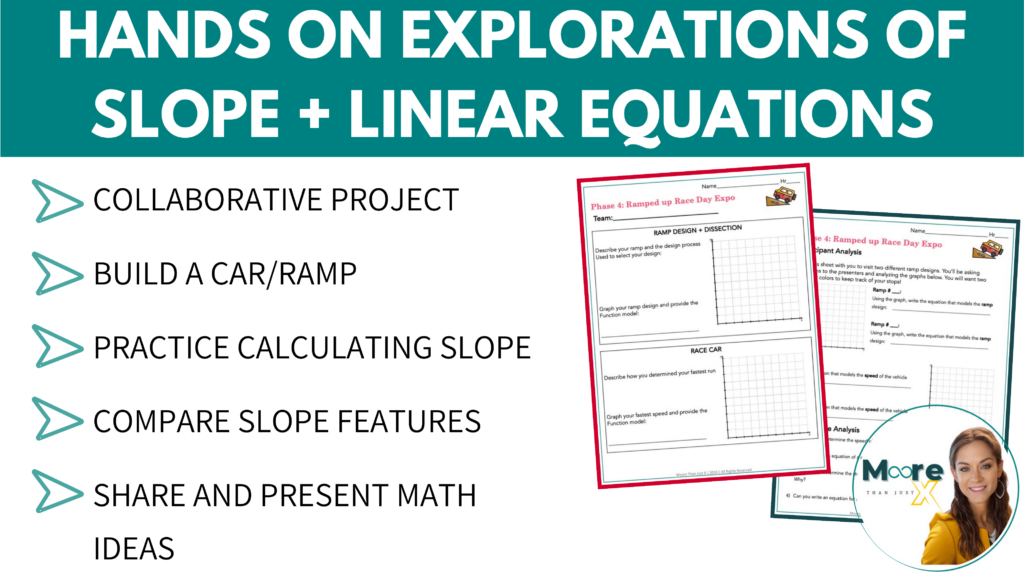
The Ultimate Hands-On Slope Project
If you’re looking for a hands-on linear equations project, then I made this exactly for you and your students.
This interactive project turns slope into a physical experience.
Students build their own ramps, test how different cars perform, and use real data to compare equations.
Instead of just solving for slope on a worksheet, they’re designing, measuring, and racing their way through linear equations.
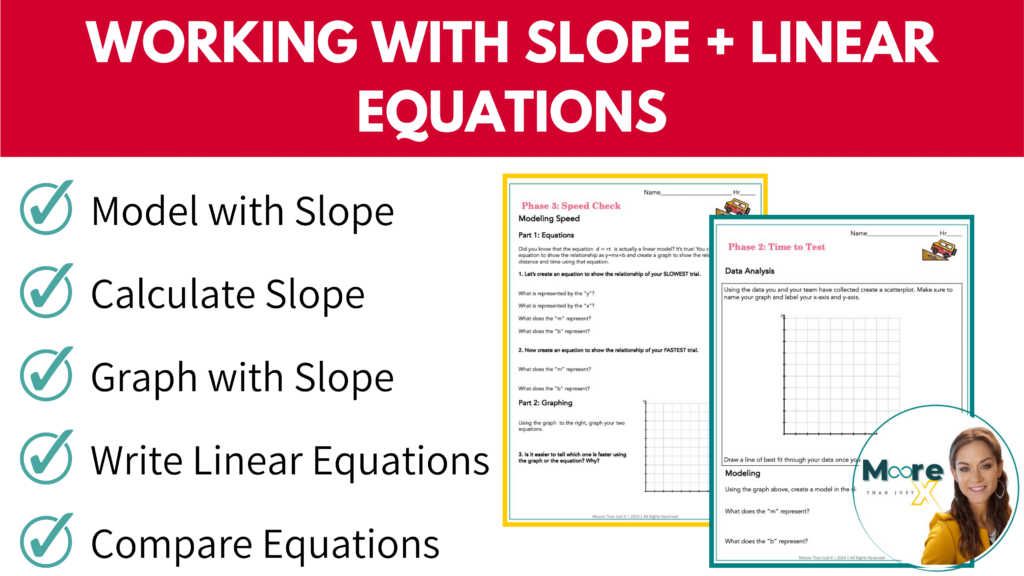
- Phase 1: Build and model ramps using linear equations.
- Phase 2: Collect data and create scatter plots.
- Phase 3: Compare graphs and equations to analyze performance.
- Phase 4: Race day expo—students present and compare their findings!
By the end, students aren’t just memorizing slope.
They understand how it works through experimentation and analysis.
Plus, this project brings in connections to scatter plots, line of best fit, and even rewriting literal equations – so they get way more than just slope practice.
Why Hands-On Learning Works for Slope
By integrating hands-on activities like this, you’re making slope something they can experience and get excited about!
And that’s when real learning really happens.
This will also give them a frame of reference for recognizing and applying use of scope outside of the classroom.
They’ll start to notice more examples in their day-to-day lives!
More Engaging Activities and Hands-On Ideas to Reinforce Slope
These activities go beyond the typical worksheet!
Let me know what you end up trying.
1. Graphing Walk: Move Through Slope
Turn your classroom into a giant coordinate plane! Use tape to create a grid on the floor and give students coordinate pairs to stand on. Then, have them physically move to model the rise and run of a line.
✅ Why it works: Helps students see slope as movement rather than just numbers in a formula.
2. Slope From Stairs: A Real-World Application
Take students to a staircase (or show them a picture of one) and have them measure the rise and run of the steps. Then, have them calculate the slope and compare different sets of stairs.
✅ Why it works: Reinforces that slope is everywhere—even in places they use every day.
3. Slope Sort: Matching Equations, Graphs, and Descriptions
Create a sorting activity where students match:
- A linear equation
- Its corresponding graph
- A real-world description of the slope
For example:
- Equation: y=2x+3
- Graph: A line going up from left to right
- Description: A car climbing a hill at a steady rate
✅ Why it works: Helps students see the connections between different representations of slope.
4. Matching Slopes: Positive, Negative, Zero, or Undefined?
Hand out a set of mini graph cards and have students quickly sort them into categories:
- Positive
- Negative
- Zero
- Undefined
You can turn this into a speed round challenge or even a relay race to keep it engaging!
✅ Why it works: Builds confidence in recognizing slope types without calculations.
5. Slope Scavenger Hunt: Find Slope in the Real World
This can be a great follow-up after having students create their own real-world slopes!
Send your students on a Slope Scavenger Hunt around the classroom, school, or even at home!
Their mission? Find and take pictures (or sketch drawings) of real-life slopes and calculate their steepness.
How It Works:
- Find It: Students look for real-world slopes – staircases, ramps, rooftops, or even book spines leaning against a wall.
- Measure It: They estimate or measure the rise and run using a ruler, tape measure, or by counting tiles/bricks.
- Calculate It: Using the slope formula, students determine the steepness of each object.
- Compare It: They analyze which objects have the steepest slopes and discuss why.
✅ Why It Works:
- Reinforces the practicality of slope – students see it in action all around them.
- Encourages problem-solving and critical thinking.
- Can be done as a group or individual activity (bonus: makes a great homework assignment!).

The Best Way to Teach Slope Is With Hands-On Learning
Slope can be tricky at first.
But when we make it come to life for our students, it becomes so much easier for them to understnad.
By using hands-on activities, real-world connections, and interactive challenges, you’re giving them more than just a formula, you’re helping them build a deep, lasting understanding of slope.
If you want an engaging, done-for-you way to bring slope to life in your classroom, get my Race to the Finish slope project.
Your students won’t just calculate slope—they’ll build it, test it, and apply it in a way that sticks.
➡️Click here to check out the project and get your students racing toward slope mastery! 🚗💨